Getting Started
This section guides you through creating a basic tessera application.
Installation
Prerequisites
- The Rust programming language
Create a new project
First, make sure you have the cargo-tessera CLI installed — it bundles the commands for creating, developing, and building Tessera apps.
cargo install cargo-tesseraThen create a new tessera project:
cargo tessera newcargo-tessera will walk you through creating the project and generate a scaffold with example code. For this guide pick the blank template.
After creation, enter the project directory and run the dev server:
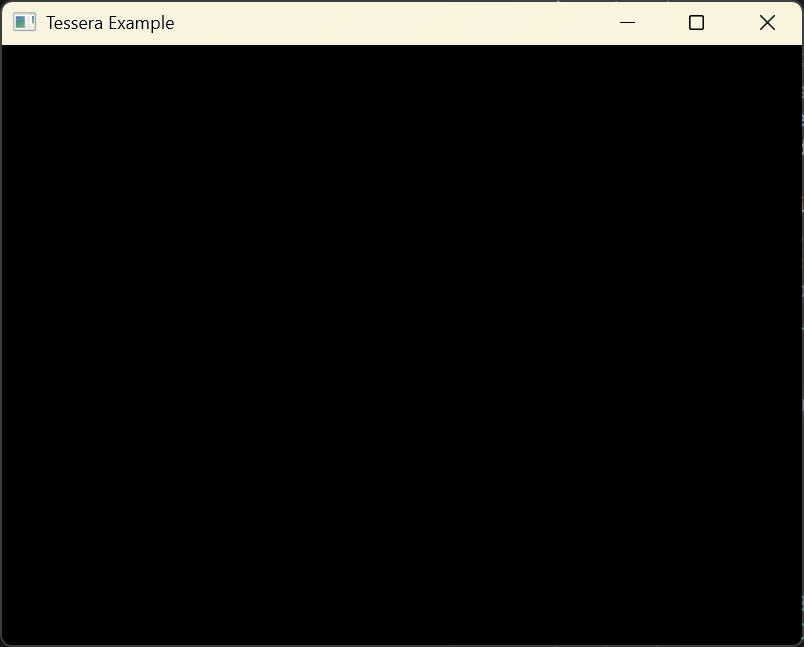
cargo tessera devIf a black or transparent window appears, your app is running.
Your first tessera
In tessera, a component is a function marked with the tessera macro — we also call components "tessera".
Add a background
Open your project's src/app.rs and find the generated app function; it should look like this:
#[tessera]
pub fn app() {
    material_theme(MaterialTheme::default, || {
        // Your app code goes here
    });
}
The blank template provides an empty app entry point — we'll add a white surface that fills the window and acts as the background:
#[tessera]
pub fn app() {
material_theme(MaterialTheme::default, || {
surface(
SurfaceArgs::default().modifier(Modifier::new().fill_max_size()),
|| {},
);
});
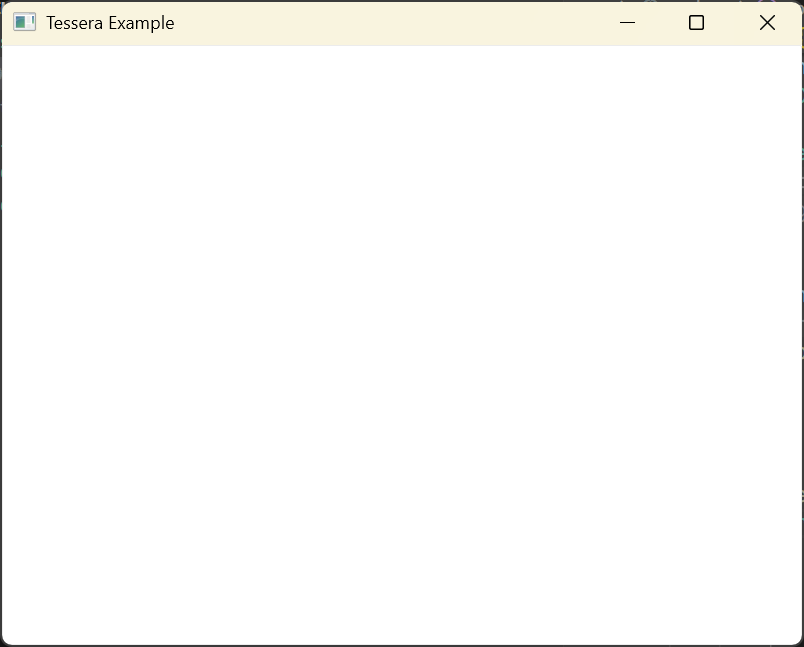
}When cargo tessera dev completes a rebuild (or after restarting it), you should see a solid background.
Add text
Next add a text component showing "Hello Tessera!":
#[tessera]
pub fn app() {
material_theme(MaterialTheme::default, || {
surface(
SurfaceArgs::default().modifier(Modifier::new().fill_max_size()),
|| {
text("Hello Tessera!");
},
);
});
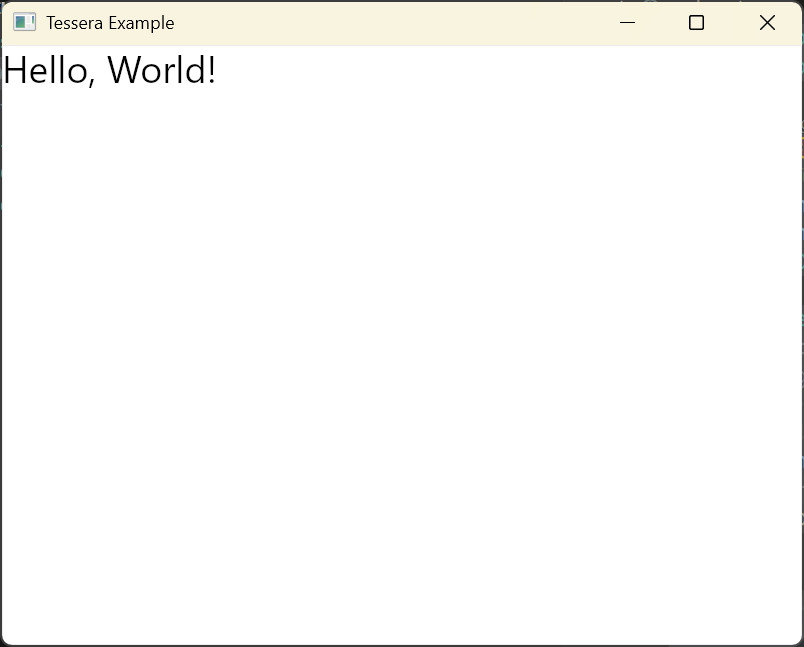
}After the dev server rebuilds, you'll see a white window with black "Hello Tessera!" text.
What's next
Congratulations — you have a simple tessera app running. Next, explore the Tessera component model.